
1 Click Options next to the language matching the Pali keyboard you're installing. In this example, "English (United States)".
Windows 10 / 11
Unzip the downloaded keyboard file and run setup.exe. Wait for the installation to complete.

The following screenshots show Windows 10 Home with the "US + Pali" keyboard. Steps are similar for Windows 11 and other keyboard variants.
Open Settings and search for "language", then select Language.
1 Click Options next to the language matching the Pali keyboard you're installing. In this example, "English (United States)".

2 Click Add an input method.

3 Select US + Pali (Unicode) from the list and click Add.
Then click Save in Language options, and go to Advanced settings in the Language window.
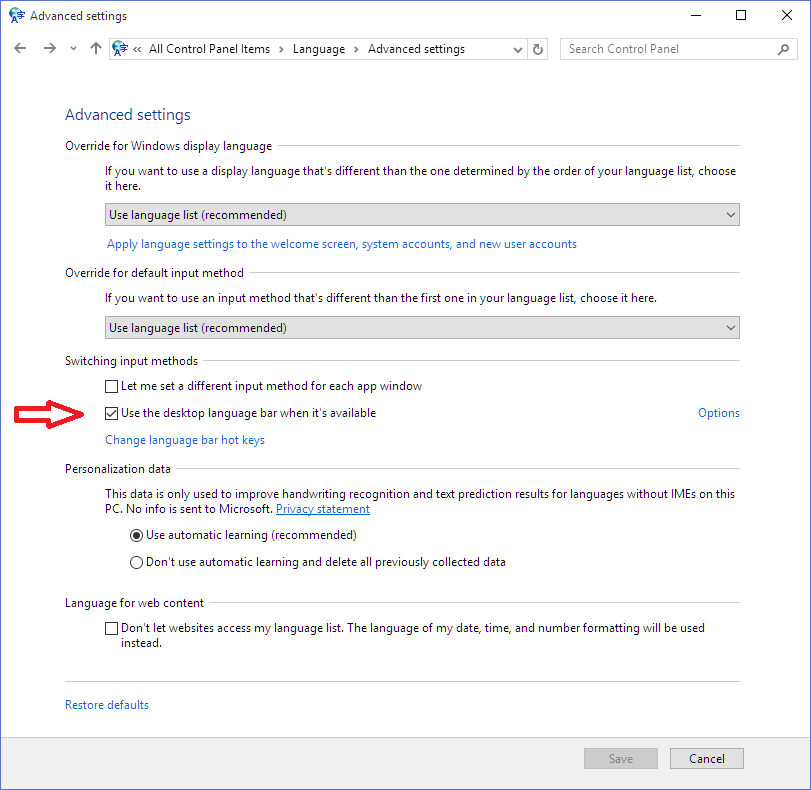
4 Check "Use the desktop language bar when it's available".
Optionally, set English (US) + Pali as your default keyboard using the dropdown under "Override for default input method".
Click Save.

5 Click the keyboard icon in the system tray (near the clock) and select US + Pali (Unicode).